среда, 6 апреля 2011 г.

Get a forum on your blogspot blog

At first, I thought it was imposible to have a forum on blogspot which actually looked like a feature that came with the site. However I was WRONG!, and I found out Nabble which was a awesome website for putting a forum on your blog.

1. Go to http://n3.nabble.com/free-forum.html.Then fill in the information and when you have filled the information, click 'Create Forum' and then go to your email and confirm your account.


2. When you have confirmed your email by clicking on the link you should come to a page like below and then click continue.


3. In the right-hand corner at the top, they should be a link that says 'embedding options', click on it.


4. Now copy the link in the text window.


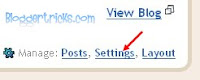
5. Go to blogspot and create a new page or post and name the title of the post forums or something on the lines of that!


6. Now click 'edit html' on the new post and paste the code given to you on that website that we were just on.


7. Then click publish post, and it should look very good. You can change the appearance if you wish by going to the link given in the email confirmation.

How to make your blogspot blog mobile friendly

Everyday, more people are using mobile phones however more people are using them to go on the Internet which means you will get traffic.Your website has to be phone/mobile 'friendly' because if the web page takes along time to load, we go on someone else's website which loads quickly.

Tips: use CTRL+F to search the codes

1. Login in to Blogspot and click on the 'design' tab and then onto 'edit html'.


2. Find this code: <b:include data='blog' name='all-head-content'/>


3. Below that code you need to paste this code:

<meta content='IE=EmulateIE7' http-equiv='X-UA-Compatible'/>

<b:if cond='data:blog.isMobile'>

<meta content='width=device-width, initial-scale=1.0, user-scalable=0' name='viewport'/>

<b:else/>

<meta content='width=1100' name='viewport'/>

</b:if>

4. Click 'save template and now your website should load quicker when you visit it on mobile phone device.


How to add a retweet button to your blogger posts

Loads of people use twitter these days. A great way to get popularity is to add a 'Retweet' button to your website. Follow this simple to tutorial to find out how!

1. Open up your blogspot dashboard and click on the 'Design' tab and then click on 'Edit HTML'.


2. Find this code using CTRL+F: <data:post.body/> 

 
3. Under that code, paste this one:  

<div style="float:left;padding: 6px 10px 6px 0px;">
<script type="text/javascript">
tweetmeme_url = '<data:post.url/>';
</script>
<script type="text/javascript" src="http://tweetmeme.com/i/scripts/button.js"> </script>
</div>

4. Save changes by clicking 'Save template'.


5. Add this code below to the posts by clicking 'Edit html' on the 'New post' page. When you have pasted this code below, click 'Publish post'.

<script type="text/javascript">
tweetmeme_style = "compact";
</script>
<script type="text/javascript" src="http://tweetmeme.com/i/scripts/button.js"></script>

Numbered Page Navigation in Blogspot

Want page numbers instead of 'Older Posts' on your Blogger Blog? This post explains how you can get numbered page navigation. 


1. Open up blogspot and click on the 'Design' tab and then click on 'Edit HTML'.


2. CTRL+F and find this code: </body>


3. Click here and paste this code above.


4. Now find this code by pressing CTRL + F: 'data:label.url'

5. Replace this code with: 'data:label.url + &quot;?&amp;max-results=5&quot;'

6. Click 'Save template' and your changed should appear.


How to add pages in Blogspot

1. Click on 'Posting' and then click on 'Edit pages'.


2. To create a new page. You need to click 'New page'


3. It should look like you are creating a new post but actually your creating a new page. Give your page a title and put some information in your page.


4. When you have put information and gave your page a title. Click 'Publish page' in the left-hand corner.


5. Click 'View page' to view the new page that you have just created.


Unlimited Photo Bandwidth in Blogger

Create a new post and upload your images to that post. Don't publish this only save it as a draft.


When you have uploaded all the images. Open each image in a new window but do not copy the image URL because this trick will not work.


Right click on the image and click 'Copy image location'.


The image location for this image is:
 
https://blogger.googleusercontent.com/img/b/R29vZ2xl/AVvXsEi5VC1RLanS03ziwV-5ATRVfg1jIeq6sO7-R_-92uHqFGen3irmJAo05C3SqpM5tb5qGVbqYN44h3Dvm7rw70JY-iI7S_9GShNpGqNHQdtQRiQQk1znAMYikYtHMAgqKchVyd3fNRPSor_c/-h/2008-05-28_124414.jpg

However this does NOT work. The trick URL is the one below which does not have the h:

https://blogger.googleusercontent.com/img/b/R29vZ2xl/AVvXsEi5VC1RLanS03ziwV-5ATRVfg1jIeq6sO7-R_-92uHqFGen3irmJAo05C3SqpM5tb5qGVbqYN44h3Dvm7rw70JY-iI7S_9GShNpGqNHQdtQRiQQk1znAMYikYtHMAgqKchVyd3fNRPSor_c/s1600/2008-05-28_124414.jpg


Hide/Remove/Disable Navbar in Blogspot

1. Sign in to Blogspot and click on 'Design', then 'Layout' and then 'Edit HTML'.


2. Paste this code below above '/* Variable definitions'.

 #navbar-iframe {   display: none !important;}

3. Save the changes by clicking 'Save template'. If you want to remove this 'hide navbar' trick. Just simply remove the code I gave you on step 2.


Placing Adsense Adverts between posts in Blogspot

1. Click on the 'Design' tab.


2. Can you see the big rectangle box which is called 'Blog' posts. If you can't, you might have to scroll down. When found; click 'edit' in the right hand corner and a new window should appear.


3. Scroll down to the bottom and halfway on that page should be a option which says 'Show ads between posts'. On the left you should  a tick box. Just click on the tick box until it gets a tick and the 'Ads' personalisation box should expand below.


4. Change the options to your liking.


5. Scroll down to the bottom and click 'Save'.


How to delete your Blogger blog

1. Click on the 'Settings' tab.


2. Click 'Delete blog' which is directly under 'Archiving'. You may have to confirm this and you will have to fill in a spam code.


How to install a blogspot template (XML)

1. Click on the 'Design' tab and then click on 'Edit HTML'.


2. Click 'Browse' and select the template which should be a XML file (.XML).


3. Now click 'Save template' however if it asks 'Your widgets will be....' click 'Confirm and save'.


Make your own email subscription form to your blog

1. First, sign in to your Feed burner account. If you don't have one you can create one by clicking here.

2. Click on 'My Feeds' which is at the top of the page.


3. Then click on the 'Publicize' tab as shown below.


4. After you have clicked on the 'Publicize' tab. Click on the 'Email Subscriptions'.


5. Click 'Activate' which should be at the bottom as shown below.


6. They are other options like email branding, delivery options...! Change these to your needs.


7. Now click on 'Subscription Managemant' and copy then copy the code that they give you.


Then paste this code to Blogspot > Design > Add Gadget > HTML and Java

How to transfer blogger between two accounts

1. Sign in to the dashboard and click 'Settings'.


2. Now, click on the the 'Permisions' tab at the end.


3. Click on 'Add Authors'.


4. Type the email address of the people who you want to invite to be authors of the blog. Then click 'Invite'.


5. Now the user should get something like the image below.


6. If they confirm the invite. Go back to 'Permisions' and click 'Grant Admin Privlidgers'.


How to redirect traffic in Blogspot

When you are creating a new website. The best way to get the visitors from your old site on to your new one is by redirecting.

1. Sign in to your blogger dashboard.

2. Click on the 'Design' tab and then click on the sub-tab 'Edit HTML'.

3. CTRL + F and find: <head>

4. Paste this code below under <head>:

<meta equiv="refresh" content="0;url=http://your-new-web-address.com/"></meta>

5. Make sure you replace 'Your-new-web-address.com' with the website which you want your traffic to go to.


 6.  Click 'Save Template' and when you go on your website now. It should redirect to the URL you wished.